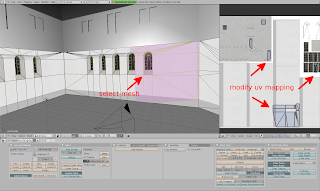
I've been having some fun recently getting the textures for my game models look just right, which has resulted in a change in my workflow. In the past, I would create a UV map by first making seams in the 3D meshes where I think the least amount of distortion would occur, unwrap the mesh, export it as a .tga file into GIMP, and then create the texture based on this file inside GIMP. As my models became more complicated, however, I would have to texture the models in layers. I also began using the Unwrap Smart Projection option, which seemed to produce flatter surfaces with less distortion. An unfortunate side-effect of this procedure was getting my mesh scattered from hell to breakfast, as you can see in the UV/Image Editor of this screenshot:

And although the UV maps generally came out more distortion free than usual, some components of the mesh (such as the windows in this model) continued to come out in different sizes and slightly skewed, which made it difficult to texture the model inside of GIMP.
After tweaking around with the software for a while, I came up with the following solution:
- Insert seams into the mesh so that the least amount of distortion occurs;
- Unwrap and the mesh using the Unwrap Smart Projection option;
- Clean up and organize the projection;
- Export as .tga file into GIMP, where a rough 3D texture is created;
- Save texture as .png file (high compression) and upload into Blender;
- In the 3D View Edit Mode of Blender, select areas in mesh that need fine-tuning;
- Adjust UV projection points in the UV/Image Editor; and
- If necessary: make aesthetic changes to 3D texture in GIMP and re-import.
Hopefully this workflow will last me for a while, or until I come up with something else that works better, is easier to do, or both.


